Posted on

Building a Christian Worldview In Your Homeschool

Berean Builders Christian Biblical Worldview

When homeschoolers consider their different choices for science, one of their questions is “What is the Christian worldview of this course?”

Since worldview can cover multiple topics, a blanket answer doesn’t suffice.

We have previously spoken of what it means to be a Berean.  But how can we apply that philosophy to further describe our worldview?

Mark 12:30 says, “Love the Lord your God with all your heart, with all your soul, with all your mind, and with all your strength.”

Building a Christian Worldview In Your Homeschool

To be a Berean is to search the scriptures to find out what is true.

When we approach science through a Biblical lens, we can focus on God’s revelation, which reduces the chance of misunderstanding.

When we understand the world around us as much as we are able, we are less likely to misinterpret the wisdom of the Bible.

Books by Dr. Wile take a holistic approach to science.

By gaining a thorough knowledge of how Christian thought has changed over the ages, students can have a better view of what is important in our world today.

And by using scripture as a focus for science, they can synthesize and formulate conclusions.

A worldview is based on the collection of things we know.

Scripture addresses many issues but is silent on others.

Science addresses many issues but cannot address every question we as humans have.

It is our goal, then, as Christians, to learn the Bible to the best of our ability and to learn about God’s gifts to us in order to create our worldview.

Building Bereans Through Critical Thinking

Students who are encouraged to think critically about science and the world around them are able to stretch their reasoning based on what they know.

In his science texts, Dr. Wile has presented both sides of certain theological beliefs.

This in-depth consideration allows students to figure out their own understanding of a concept. And this understanding allows them to form their own worldview on the topic.

It is our belief that a proper understanding of the world around us begins with scripture.

The Bible is God’s revelation to us as an infinite being communicating with us finite humans.

Having the Bible as an anchor and a focus allows us to comprehend the world around us as much as we can, making us far less likely to misinterpret the scriptures.

Including God In Science Books

Dr. Wile has been asked why he chose to include God in his homeschool science textbooks and curriculum sources.

“It was never my intention to proselytize through my books. If a student found God as a result of my instruction, wonderful. Instead, I realized including God in my texts was simply the right way to teach science.”

Far from claiming any particular doctrinal belief in his science courses, Dr. Wile presents different sides, often opposing, of those beliefs Christians have considered throughout history.

Even prominent men such as C.S. Lewis and Henry Morris, although pioneers in Christian thought, had radically different beliefs.

Students are able to learn these different beliefs and weigh them on the scale of science instruction and hands-on lab work to form their own opinions based on what they discover, both through science and through a study of the Bible.

Through these discoveries, the world of science is open to them, tempered by the Word of God.

Posted on

What Counts as Science in Your Homeschool?

What Counts As Science In Your Homeschool

When you think about science what comes to mind? For many of us, it’s lab coats, experiments, and textbooks filled with complex theories. Homeschoolers often ask us, “What counts as science in my homeschool?”

The good news is, science can be a part of your child’s everyday learning experiences.

Science is a way for you and your child to explore the world, ask questions, and discover answers together.

With this in mind, we created this resource to guide you through what counts as science in your homeschool, encouraging creativity, curiosity, and hands-on learning.

Defining Science in Your Homeschool Context

From the outset, it’s important to define what science means in the context of your homeschooling environment. Science encompasses a wide array of disciplines: biology, chemistry, physics, earth science, and more. Yet, at its core, science is about inquiry and understanding the natural world.

Ask yourself: what interests your child? What sparks their curiosity? Science can be woven into nearly every aspect of your daily life. Whether you’re observing nature, conducting simple experiments in your kitchen, or discussing scientific principles, you are engaging in scientific exploration.

Types of Science You Can Explore in Your Homeschool

Life science

Life science is a fantastic area to explore with your homeschooler. This might include studying plants, animals, and ecosystems. You can turn your backyard or terrace into a living laboratory.

  • Go on a nature walk to observe the plants and animals in your environment. Encourage your child to take notes or draw what they see in a nature journal. Visit parks in your area, spending time with any onsite experts to discover new information about the flora and fauna.
  • Plant a small garden together, then discuss the life cycle of plants and the importance of ecosystems. Follow the development of your garden throughout the seasons. Observe insects that visit your plants and discover whether they are harmful or beneficial. Encourage pollinators by researching and including plants that attract them.
  • Investigate local wildlife. Create projects around their habitats, behaviors, and roles in the ecosystem, and have your child keep notes about their observations. Explore the difference between native flora and fauna and possibly invasive species in your area. Search for free information online from the natural resources departments in your area.

Physical science

Physical science involves the study of matter and energy and creates wonderful opportunities for hands-on experiments right at home. Have your homeschooler use notebooks to document their discoveries.

  • Engage in fun projects with simple experiments like making slime, baking soda volcanoes, or exploring the properties of magnets. Integrate sound by using stereo speakers to discover the effects of sound waves. Visit the library for interesting books or look online for more kitchen science ideas.
  • Explore physics in motion by using toys like cars and ramps to teach about speed, friction, and gravity. Let your child use their creativity to make various designs and record the results of each version. This is a great way to incorporate STEAM learning in your homeschool.
  • Try some chemistry at home by cooking together and exploring chemical reactions like melting, boiling, and the changes in states of matter and properties of water. Yes, even baking cookies incorporates science!

Earth science

Earth science can help your child understand our planet’s systems and how they interact. Try these engaging activities:

  • Track weather by creating a journal to record daily conditions. Discuss patterns and the science behind weather phenomena. Follow the watercourses in your area from rainfall to lake, river, or ocean.
  • Collect different rocks and minerals. Use resources to identify them and learn about the earth’s crust. Visit different geological zones nearby to compare the variety of landforms around you.
  • Explore astronomy through stargazing and discussing the solar system. You can create models of planets or track moon phases. Schedule a meteor shower watch party or follow the constellations throughout the year that are visible from your home.

Incorporating the Scientific Method

A key component of science is the scientific method, a step-by-step approach to inquiry. It’s important to incorporate this into your lessons using the following steps:

  • Ask a question
  • Do background research
  • Construct a hypothesis
  • Test your hypothesis
  • Analyze data and draw conclusions
  • Communicate results

Visit our article on the scientific method for a more detailed explanation.

Using Resources Effectively

Homeschooling provides the flexibility to use a variety of resources including books and textbooks, online resources, science apps and games, and field trips.

  • Use engaging, age-appropriate books that cover a wide range of scientific topics. Include those with illustrations and hands-on experiments.
  • Websites like NASA, National Geographic, and educational YouTube channels offer vast amounts of information and engaging videos.
  • Incorporate mobile apps that can identify plants, bird calls, and other physical items using your phone’s camera and microphone.
  • Search for interactive science games and virtual experiments online. Or play science board or card games that allow for fun and learning at the same time.
  • Plan visits to science museums, planetariums, or nature preserves to provide real world context and inspiration.
  • Find ways to explore science vocabulary in your everyday conversations. Use our fun science root word matching game to get started!

Creating a Science Friendly Environment

Your home environment can foster a love of science. To create an engaging space to explore scientific topics, set up a specific area for science activities or a dedicated workspace equipped with tools and materials. But don’t confine science to just one spot. Science is all around you!

Showcase your child’s experiments and findings by displaying projects. This not only boosts confidence but also sparks ongoing interest and can be fun conversation starters when friends or family visit.

Encourage questions and make it clear that no question is too silly. Emphasizing curiosity is key to developing critical thinking skills.

Fostering an Attitude of Inquiry

Expect your child to be curious about the world around them. Share your own questions and interests in science and ask open-ended questions during discussions to stimulate deeper thinking. Show enthusiasm for scientific discovery. When you encounter a science-related topic, explore it together, then invite your child to research answers from multiple sources and viewpoints.

Nearly every inquiry can lead to scientific exploration. Why is the sky blue? Where do birds go in the winter? How does a scratch heal? Use the curiosity of your homeschooler to introduce scientific answers but remember to keep it light and engaging. It’s easy to slip into “homeschool teacher mode” when your child shows interest in a topic, but not everything requires a full lesson.

Tailoring Science to Unique Interests

Each child has unique interests that can guide their scientific exploration, and it’s up to you to determine how deeply to pursue a topic. Perhaps they’re fascinated by technology, animals, or environmental issues. Tailor your lessons to their preferences.

If your child is drawn to technology, consider exploring coding, robotics, or simple engineering projects. For those interested in ecology, dive into topics like conservation, climate change, and renewable energy sources.

Some homeschoolers will want to spend countless hours on one topic, while others will be satisfied with a general reply to their questions. Follow your child’s lead to determine the level of their interests and guide them where necessary.

In your homeschool, what counts as science is as limitless as your child’s curiosity. By approaching science through exploration, experimentation, and discussion you cultivate a rich learning environment. When you engage with your child’s questions, and interests, you create a joyful and dynamic experience that lays the foundation for a lifelong love of learning.

Remember science isn’t just about definitions and formulas: it’s about discovering the world together. Embrace the process and let your child’s natural curiosity guide your scientific journey.

Posted on

STEAM Learning in Your Homeschool: A Parent’s Guide

STEAM learning with homeschool child

As a homeschooling parent, you’re always looking for ways to provide your children with a well-rounded enriching education. One approach that has gained significant traction in recent years is STEAM learning, but what exactly is STEAM, and how can it benefit your homeschool?

What Is STEAM?

STEAM stands for Science, Technology, Engineering, Arts, and Mathematics. This interdisciplinary approach to learning encourages students to explore both the natural and constructed worlds through the lens of multiple disciplines, leading to a deeper understanding of concepts and their real-world applications.

Unlike traditional siloed academic subjects, STEAM learning emphasizes the connections between these fields, challenging students to think critically, solve complex problems, and tap into their creativity.

By integrating these elements, STEAM education prepares learners for the increasingly interdisciplinary nature of the modern workforce and equips them with the skills needed to thrive in a rapidly changing world.

In your homeschool, STEAM learning can take on many forms, from structured unit studies to more open-ended, project-based activities. The key is to encourage your children to explore, experiment, and engage with the material in hands-on, meaningful ways.

The Benefits of STEAM Learning

One of the primary benefits of STEAM learning is its ability to spark your homeschoolers’ natural curiosity. By presenting them with real-world challenges and problems to solve, you can tap into their innate desire to understand how things work and how they can be improved or optimized. This curiosity-driven approach helps to foster a love of learning that can last a lifetime.

Moreover, STEAM learning is valuable because it develops critical thinking and problem-solving skills. As your children work through STEAM based activities, they’ll learn to break down complex problems, analyze data, and devise creative solutions.

These skills are not only essential for success in STEM (Science, Technology, Engineering, and Mathematics) fields but also transferable to a wide range of academic and professional pursuits.

Another important aspect of STEAM learning is its emphasis on the arts. By integrating artistic expression and design thinking into the curriculum, you can nurture your children’s creativity and help them develop a more holistic understanding of the world around them.

This can lead to enhanced problem-solving abilities, improved communication skills, and a heightened appreciation for the role of aesthetics in daily life.

How to Incorporate STEAM Learning in Your Homeschool

To incorporate STEAM learning into your homeschool, you might start by introducing your students to engineering challenges, where they work to solve problems using the engineering design process.

Encourage your children to sketch their ideas, test their prototypes, and review their designs based on feedback and observation.

You can also integrate STEAM concepts into your existing curriculum by exploring the science behind art, the mathematics behind music, or the technology behind historical innovations.

For example, you might have your children create their own geometric art pieces, compose rhythmic patterns, or investigate the physics of flight by building and testing paper airplanes.

Berean science courses offer plenty of opportunities for practical applications of STEAM activities. The many hands-on science experiments included with every course gives your students a starting point for further investigation using STEAM concepts.

You’ve got the science! Here are some examples to bring focus to technology, engineering, art, and mathematics in your Berean science homeschool planning:

Leverage Technology

  • Introduce your children to emerging technologies like robotics, 3D printing, or renewable energy systems, and have them experiment with applying these tools to solve scientific problems.
  • Encourage them to research and report on how recent technologies are advancing scientific discovery and innovation.
  • Integrate virtual reality, augmented reality, or other digital tools into your science lessons to enhance visualization and exploration.

Incorporate Engineering

  • Present your children with open-ended engineering design problems, such as building a bridge that could hold the most weight or creating a device to clean up an oil spill.
  • Guide them through the engineering design process of defining the problem, researching solutions, prototyping, testing, and improving their designs.
  • Have them document their design process and present their final solutions to you or other family members.

Integrate Art

  • Have your students create scientific illustrations or diagrams in their notebooks to help visualize and explain scientific concepts they are learning.
  • Engage them in designing their own experiments or models, focusing on the aesthetics and visual communication of their designs.
  • Encourage them to create sculptures, paintings, or other art pieces that represent scientific phenomena, principles, or theories.

Explore Mathematics

  • Show your students how to analyze scientific data and measurements to help them understand how mathematical concepts like statistics, geometry, and algebra are used in scientific inquiry.
  • Have them create mathematical models to predict or explain scientific phenomena.
  • Incorporate math-based coding or programming activities into your science lessons, such as using simple computer simulations.

Emphasize Real-World Connections

  • Tie your science curriculum to current events, local environmental issues, or technological advancements to help your children see the relevance and practical applications of what they’re learning.
  • Plan field trips or virtual excursions to museums, science centers, or research facilities to expose your children to STEAM professionals and authentic scientific work.
  • Invite STEAM experts, such as engineers, scientists, or artists to share their experiences and insights with your students.

As you delve into STEAM learning, be sure to foster an environment of collaboration and communication. Encourage your children to work together, share their ideas, and provide constructive feedback to one another. This not only promotes teamwork and social skills but also helps to reinforce the interconnected nature of the STEAM disciplines.

Remember the key to successful STEAM learning is to make it engaging, relevant, and fun. By tapping into your children’s natural curiosity and allowing them to explore their interests through hands-on activities, you can help them develop a deep, lasting understanding of the world around them.

As you continue on your homeschooling journey, embrace the power of STEAM learning to nurture your children’s creativity, critical thinking, and love of discovery. With this comprehensive approach, you’ll not only prepare them for academic and professional success but also help them become well-rounded, adaptable, and curious individuals, ready to tackle the challenges of the 21st century.

Posted on

Science Vocabulary: Homeschool Learning Resources

We love science! At Berean Builders, we believe science is a fascinating subject that fuels curiosity and encourages exploration.

Whether your homeschooler is a budding scientist or simply eager to understand the world around them, a strong foundation in science terms is essential. Effective learning requires knowledge of the topic vocabulary.

If you took science classes in school, you remember learning science vocabulary. By familiarizing your student with these linguistic building blocks, you can help them more deeply understand various scientific disciplines and ideas.

Critical thinkers utilize strong vocabularies as they seek to comprehend new concepts.


Studying Science: The Power of Root Words

Before diving into specific science vocabulary, it’s important to understand the significance of root words. Root words are the foundation upon which many scientific terms are built. By recognizing common Greek and Latin roots, homeschoolers can decipher the meanings of scientific words, even when they encounter them for the first time.

Here are some frequently used scientific roots (both prefixes and suffixes), their meanings, and some common uses:

Bio – Life: biology, biotechnology, biosphere

Geo – Earth: geology, geography, geophysics

Astro – Space: astronomy, astrophysics, astronaut

Hydro – Water: hydrology, hydroelectricity, hydroponics

Aero – Air: aerodynamics, aerospace, aeronautics

Photo – Light: photosynthesis, photography, photovoltaic

Micro – Small: microscope, microbiology, microorganism

-ology – The study of: biology, geology, ecology

-ist – One who studies: chemist, physicist, zoologist

-metry – Measurement: telemetry, geometry, tachometry

Essential Science Vocabulary

Let’s explore a selection of frequently used science vocabulary that homeschoolers should become familiar with.

Hypothesis: a proposed explanation or prediction based on limited evidence, serving as the starting point for scientific investigation.

Experiment: a carefully designed procedure to test a hypothesis and gather data.

Variables: factors that can be changed or measured in an experiment, such as independent variables (manipulated) and dependent variables (observed).

Observation: the act of carefully watching or noting something to gather information.

Theory: a well-substantiated explanation of natural phenomena, supported by a vast body of evidence and scientific consensus.

Law: a statement that describes an observed phenomenon in nature, often expressed as a mathematical equation.

Energy: the capacity to do work or cause change. It exists in various forms such as kinetic, potential, thermal, and electrical energy.

Matter: anything that has mass and takes up space. It can exist in solid, liquid, or gaseous states.

Ecosystem: a community of living organisms, along with their physical environment, that interact and depend on each other.

DNA: deoxyribonucleic acid, a molecule that carries genetic information and serves as the blueprint for the development and functioning of all living organisms.

Scientific Method: a systematic approach used by scientists to investigate and understand the natural world.

Science Tools and Instruments

One fun part of science is being able to use tools and instruments to view, measure, and manipulate components during a lesson. When your student is familiar with the vocabulary of scientific instruments, learning expands with the knowledge of how they are used.

Telescope Pipette Balance
Thermometer Microscope Centrifuge
Graduated cylinder Test tube Compass
Beaker Hydrometer Flask

Branches of Science

Science is a vast field with several specialized branches. Each discipline uses its own set of related vocabulary.

Biology: the study of living organisms and their interactions with their environment.

Cells Evaporation Organism
Genetics Mitosis Metamorphosis
Evolution Osmosis Bacteria
Ecosystem Symbiosis Biodiversity

Chemistry: the study of substances, their properties, composition, interactions, and changes.

Electron Compound Acid
Proton Reaction Base
Neutron Periodic table Solvent
Element Oxidation Solution

Physics: the study of matter, energy, and the fundamental forces that govern the universe.

Gravity Acceleration Momentum
Force Displacement Velocity
Motion Inertia Entropy
Energy Friction Quantum

Astronomy: the study of celestial objects, space, and the universe.

Planet Comet Galaxy
Black hole Satellite Asteroid
Heliocentric Binary star Light year
Constellation Magnitude Eclipse

Geology: the study of the Earth, its rocks, minerals, and the processes that shape the planet’s structure.

Magma Minerals Erosion
Plate tectonics Aquifer Sedimentary
Igneous Subduction Hydrothermal
Crust Bedrock Mantle

We could go on and on with science vocabulary!

When you introduce your student to new science words and help them understand their meanings in context, you give them tools to make connections between concepts, decode complex terms, and cultivate a lifelong love for science.

Science Vocabulary Everywhere!

The best way to give your homeschooler the gift of scientific knowledge is to immerse them in one of our comprehensive science courses. From earth science to biology, chemistry, physics, and more, your student can engage in exploration of our universe, our planet, and the life around us, all while encouraging critical thinking and creativity.

With conversational text, hands-on experiments your student can perform right at home, and support from us here, Berean Builders science courses bring the world of science to your homeschool adventure.

More Resources For Homeschool Science

Come see our wide selection of science courses for…

…that cover plenty of science vocabulary and help your student explore the world.

Posted on

Homeschool Burnout: 27 Ideas to Find Balance

young woman holding book and thinking

You know the feeling. Everyone is grumpy. No one wants to do the lessons for the day. You’re all in yesterday’s clothes. There may be tears. You’re experiencing homeschool burnout.

 8 Signs You’re Doing Too Much in Your Homeschool

The specific signs of burnout are common among many situations:

  • Feeling constantly tired, lacking energy, difficulty getting through the day.
  • Becoming easily annoyed or impatient with your children or the homeschooling process.
  • Finding it difficult to get excited about teaching or engaging in educational activities.
  • Struggling to accomplish planned lessons or meet educational goals or deadlines.
  • Experiencing feelings of overwhelm, anxiety, or sadness related to homeschooling.
  • Developing headaches, muscle tension, or other physical manifestations of stress.
  • Failing to prioritize your own well-being and neglecting activities that bring you happiness and relaxation.
  • Losing the joy and satisfaction that you once found in homeschooling.

If you notice these signs persistently, it might be an indication that you and your children need a break.

AND THAT’S OKAY.

If you’re feeling like a failure because you’re experiencing burnout, we’re here to give you big hugs and help you take steps to move past this difficult time.

Taking a mental health day from home education is absolutely vital and can be beneficial for everyone involved.

First, recognize and acknowledge that you and your children require a break, and that it is a normal part of the homeschooling journey.

Next, open communications with your children. Discuss the idea of taking a mental health day, explaining the importance of taking care of yourselves and that a break can help rejuvenate your whole crew.

Plan Your Day Off

Once everyone is on board with a much-needed time out, engage in a little planning session. Let your children help by encouraging them to help choose the activities they enjoy and find relaxing.

Use your day off to prioritize self-care for yourself, and make sure your children do the same. Engage in activities that promote relaxation, such as reading, spending time in nature, or pursuing hobbies.

After Your Day Off

Take some time at the end of your day to reflect on your homeschooling journey. Remember why you’ve taken on the responsibility of educating your own. Consider any necessary adjustments or changes that could help prevent burnout in the future.

After your mental health break, gradually ease back into your homeschooling routine. It’s okay to take it slow. Remember to incorporate breaks and self-care practices into your daily schedule to stave off the effects of doing too much.

Taking care of your mental health and emotional well-being is essential for effective homeschooling and is as important as math, science, history, and literature.

By having the courage to say ENOUGH, recognizing and addressing that burnout is real, you can create a healthier and more sustainable homeschooling experience for you and for your children.

Need some self-care ideas?

Here is a list of gentle activities to do today to help you and your children unwind and relax to better deal with your homeschool responsibilities tomorrow.

27 Ideas to Help You Find Balance in Your Homeschool Journey

  • Relax your mind: Engage in mindfulness exercises, prayer, or guided meditation to help reduce stress and promote relaxation.
  • Move your body: Enjoy physical activities together such as going for a quiet walk, bike ride, or gentle sport to help release endorphins to boost your mood and reduce stress.
  • Create something new: Encourage your children to engage in activities like drawing, painting, crafting, or playing a musical instrument. Join with them and explore your own creative outlets. Just make sure these activities don’t generate more stress than they alleviate.
  • Embrace nature: Spend time outdoors on a quiet hike, or having a picnic in the park, or simply enjoying a walk in the fresh air, maybe somewhere new to you. Nature has a calming effect on your frazzled nerves. Go barefoot if you can!
  • Read a book: Set aside time for reading, either individually or together as a family. Choose books that you find enjoyable and calming, or maybe even humorous. Laughing reduces stress, too.
  • Play a game or watch a movie: Dedicate an evening for family game night (unless you have uber-competitive members of the family) or movie night. Take turns selecting games or movies everyone can enjoy. Even spending time in a video game is self-care if that’s what you or your children enjoy.
  • Write something: Start or add to a journal and encourage your children to do the same. Write a letter to a loved one or good friend. Writing and expressing thoughts and feelings can be a therapeutic outlet for emotional well-being.
  • Have a spa day: Set up a mini spa at home, complete with face masks, foot soaks, and relaxing music. Take turns pampering each other for some quality bonding time. Or spring for a session at a real spa and indulge in a well-earned massage.
  • Listen to music or a podcast: Create a playlist of soothing or uplifting music to listen to. You can also explore educational or entertaining podcasts that cater to your children’s interests.
  • Play! Allow your children (and yourself!) to have unstructured playtime where you all can engage in imaginative play, build with blocks, or play with favorite toys. This promotes creativity and relaxation. Put together a puzzle, build a sandcastle, fly a kite. The options are limited only by your imagination. Follow their lead, because your kids know how to have fun.

Take Your Time Off. Disconnect.

Tailor self-care activities to your and your children’s interests and preferences, and forget about school for a while.

The key is to engage in activities that bring joy, relaxation, and a sense of well-being to everyone in your family.

Wow! Wasn’t That Awesome and Rejuvenating?

Now that you’ve had a much-needed mental health day, and you’re ready to dive into homeschooling again…

how can you prevent burnout in the future to maintain a healthy and sustainable homeschool environment?

First, set realistic expectations. Recognize you’re not SuperHomeschoolingMom. We all believe we can do more than we or our children are often physically able. Accept your limitations and realize your children will receive a great education despite them.

Homeschooling is a journey with ups and downs, and it’s okay to have days that don’t go as planned.

Create a flexible schedule so you don’t feel as if you’re boxed in by deadlines. Take breaks, rest periods, and time outs for self-care throughout the day to prevent feelings of overwhelm and exhaustion.

Keep your homeschooling approach fresh and dynamic by incorporating a variety of teaching methods, resources, and activities to keep boredom and burnout at bay.

Make self-care a priority. Recharge and refresh yourself. Practice self-reflection.

Create a positive learning environment by designating a space for homeschooling that is organized, comfortable, and conducive to learning.

Connect with other homeschooling families or support groups to help alleviate feelings of isolation and provide valuable support.

Don’t be afraid to delegate certain responsibilities or outsource certain subjects or activities. Can’t do math? Let someone else teach it for you.

Assess what’s working and what’s not, and don’t be afraid to make sweeping changes when required. Homeschooling is all about learning and growing, and not just for your children.

Stay open to new ideas and educational approaches. Attend workshops, conferences, or take online courses to enhance your teaching skills and discover fresh ways to keep learning fresh and exciting.

Explore educational resources including books, podcasts, or documentaries that inspire and ignite your passion for teaching.

The last thing you want to do is quench the spark that you and your children have for homeschooling.

Celebrate milestones, progress, and accomplishments—both yours and your children’s.

Prioritize your own well-being along with the educational needs of your children to create a homeschooling experience filled with joy and excitement.

We at Berean Builders want your homeschooling journey to be filled with fun and growth and create lifelong curiosity and a wealth of pleasant memories for you and your children.

Posted on

DNA and RNA: Homeschool Learning Resources

DNA and RNA learning resources

To properly study genetics, students must understand the fundamental components of DNA and RNA, the molecules of genetics. Not only will this knowledge enrich your students’ appreciation for God’s creation, this subject can also be a springboard into many other scientific discussions in biology and even biotechnology.

So how do you go about presenting DNA and RNA in your homeschool?

DNA and RNA Basics

Since DNA and RNA are complex concepts, first build a solid foundation of understanding. Begin with the basics, explaining that DNA (deoxyribonucleic acid) and RNA (ribonucleic acid) are essential molecules that carry genetic information.

You can use simple, age-appropriate analogies to make these concepts more accessible. For example, compare DNA to a blueprint that holds all the information needed to build and operate a house (the cell), while RNA is like a set of instructions that are read from the blueprint to create different components of the house.

DNA and RNA Structure

Students should understand the structure of DNA and RNA. Use models, diagrams, and visual aids to explain how DNA is composed of two long chains of nucleotides twisted into a double helix. Meanwhile, RNA is a single-stranded molecule with a similar nucleotide structure.

Use simple craft projects to help students create DNA and RNA models, which can be a fun and hands-on way to reinforce their understanding of these molecules. Even older students will enjoy building models to help them better visualize the microscopic intricacies of DNA.

Extracting DNA from a strawberry or banana is a popular activity for all grades where students can follow the process and see the strands that contain the instruction manual directing the growth of the fruit.

The Function of DNA

Introduce the primary function of DNA. Explain that DNA is the hereditary material that contains the instructions for building and maintaining an organism. Encourage students to think of DNA as the “data bank” that holds the information necessary for life.

Connect this to the study of genetics and probability by creating a family tree or pedigree chart to show how genes are inherited and passed down through generations.

DNA replication is a fundamental process in genetics that enables cells to make copies of their DNA. To help students grasp this concept, use a hands-on activity. You can compare DNA replication to unzipping a zipper and then zipping it up again, with each zipper side serving as a template for creating a new strand of DNA. This will make the process of DNA replication more tangible and understandable for young learners.

Label a paper zipper model with A, T, C, and G cutout shapes to show how these nucleotides fit together like puzzle pieces. Explain that this DNA “alphabet” forms DNA “words” which join together to form the “sentences” we call genes.

Along with teaching DNA is the study of RNA. Explain that RNA acts as a messenger, carrying instructions from DNA to the cellular machinery that builds proteins.

Variations and Mutations in DNA

To make the lessons more engaging, introduce the concepts of variations and mutations. Explain that mutations are changes in the DNA code that appear during replication. These “edits” can result from various factors, including exposure to radiation or chemicals or may simply be an error in translation.

You can use simple, everyday examples like a typographical error in a book to help students understand how mutations can lead to genetic variation and sometimes diseases. Explore interesting variations such as why some people think cilantro tastes like soap.

Genetics in General

Bringing the world of genetics into real-life contexts can make learning more meaningful. Discuss how genetics plays a role in various aspects of life, from the production of genetically modified organisms (GMOs) to understanding the genetic basis of inherited diseases.

Explore the work of famous geneticists and their contributions to the field, such as Gregor Mendel, James Watson and Francis Crick. You can even explore recent breakthroughs in genetics, like gene sequencing, cloning, and CRISPR gene editing, to showcase the evolving nature of the field.

DNA and RNA in Berean Builders Science Courses

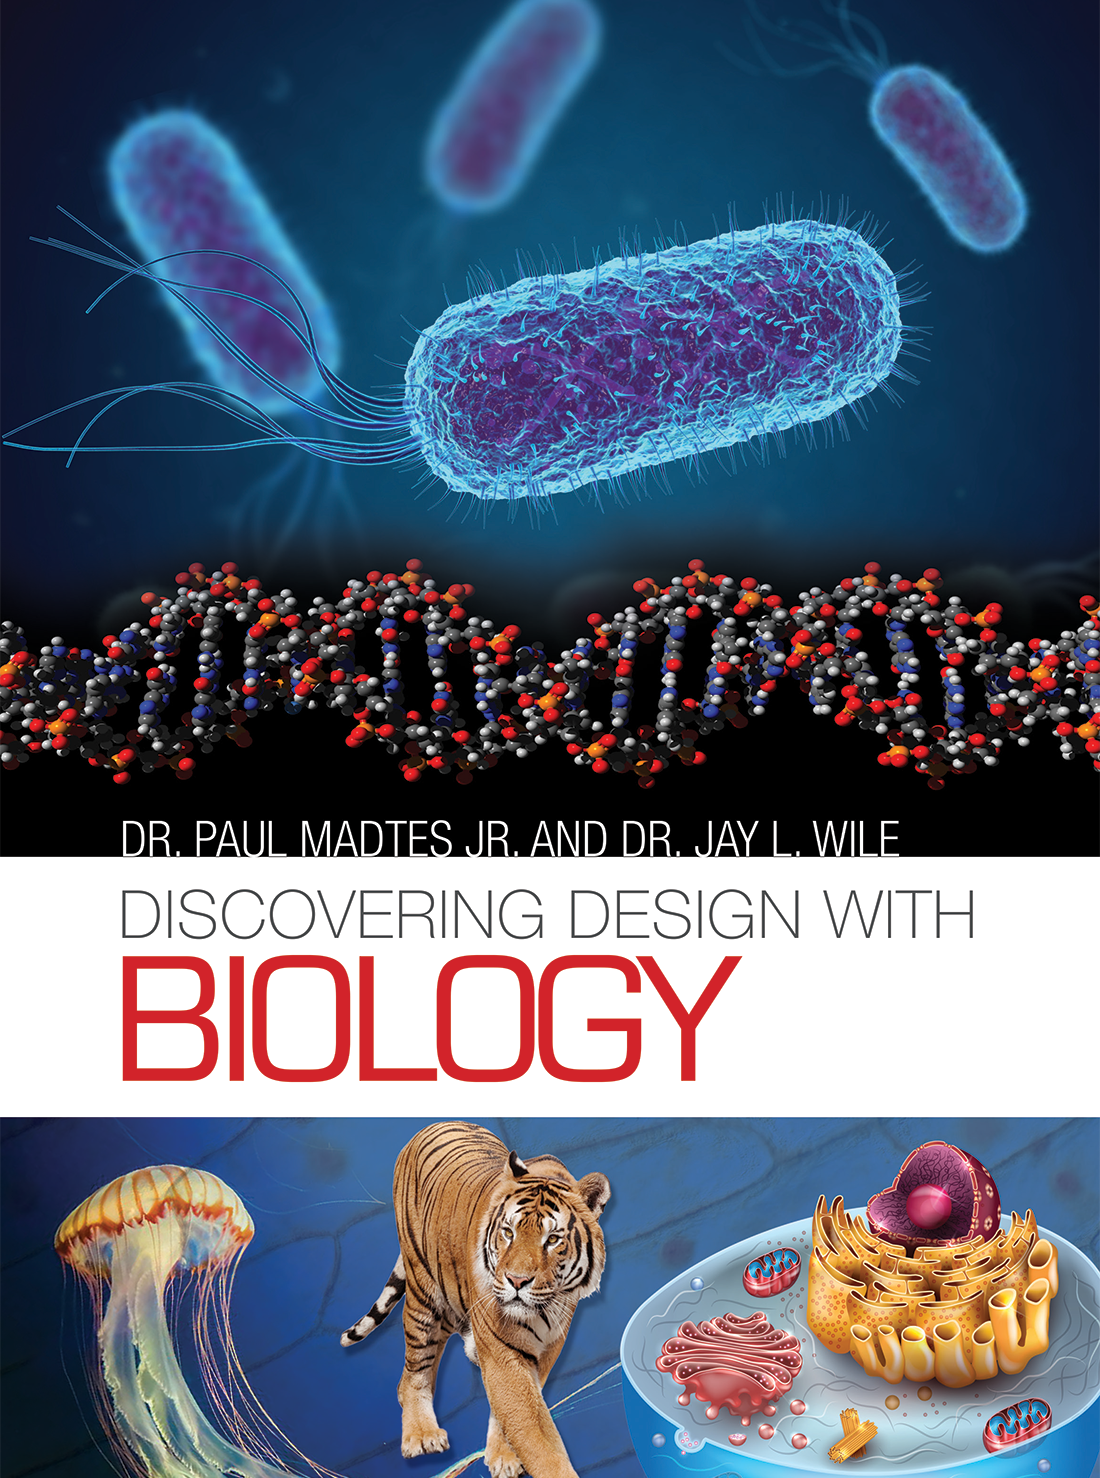
We introduce Gregor Mendel in our Science in the Industrial Age course and explore DNA in our Science in the Atomic Age course and our Discovering Design with Biology.

Your homeschoolers will enjoy the conversational tone of our courses and the hands-on experiments we provide to bring science to life for your students. And as always, we provide plenty of resources and encouragement for you and are happy to answer any questions you or your students may have.

Posted on

Genetics and Probability: Homeschool Learning Resources

Homeschool life science and biology courses dive into the wonderful world of genetics and probability. While this can seem like a daunting subject, the courses at Berean Builders introduce these topics with conversational language and hands-on experiments to help students understand the complexities of how they work.

Family Genetics: Physical Traits and Medical History

You can begin to introduce the concept of genetics to your elementary school students by studying your own family and how some relatives carry the same hair color, eye color, or other traits through the generations.

And since our genetic makeup often determines our health and chances for medical problems, younger students can understand genetic tendencies to heart disease or other inherited issues in their family history.

Genetic Probability for Elementary Students

Heredity is complex and based on dominant and recessive gene characteristics, but your younger students can grasp probability with a simple activity using colored beads and a set of dice. Connect the colors to genetic traits and have them answer questions or create graphs related to how often a number or color appears.

You can also provide coins marked with various genetic traits and have the students keep up with the outcomes of a certain number of tosses. Include different traits, such as facial features, then have your student draw that face, or choose a pet and let probability determine its characteristics.

Of course, working with a small Punnett square can offer a clear comparison of simple traits that are dominant or recessive. Introduce Gregor Mendel, then use dog traits, flower traits, or even design-your-own-alien traits to make the activity fun.

Hands-On Genetics Experiments for Homeschool

Experiment with growing plants that can be cross-pollinated to chart leaf shapes or flower colors. Show how genetics is used in breeding programs to develop crops with desirable traits, such as drought resistance and higher yields. This microcosm of genetics can help students understand the bigger picture of traits in other plants, animals, and humans.

You can also cover animal husbandry to discuss how genetics is applied in animal breeding to enhance the quality of livestock throughout history and in modern day farming and ranching.

Teaching Genetics in High School

As your homeschool student moves into higher grades, you can expand the scope of study in genetics and probability. Include current events and related science announcements to encourage questions to research.

Explain the make-up of chromosomes and where genes are located. Explain that certain characteristics are carried only by X or Y chromosomes, making some traits (and diseases) more likely to appear in a specific gender. Show the basics of DNA structure and explore the double helix design. Include hands-on models to magnify the intricate workings of DNA.

Investigate blood types and how they are inherited, how transfusions work, and who can give blood to whom. Get an inexpensive blood-typing kit and test everyone in the family. This is another opportunity to sleuth out familial patterns as well as potential blood disorders that could appear in future generations.

Taking basic Mendelian concepts a step further, your student can explore more complex traits that involve multiple genes and environmental factors. These calculations require a bit more math knowledge and a few probability equations.

Explore how our environment affects our genetics. Can what we drink, eat, and breathe cause genetic mutations in our bodies? Knowing how mutations occur is a stepping stone to understanding how outside influences can cause changes in our bodies.

Introduce cloning and how the offspring are intended to be genetically identical to the parent. Open up a discussion about the ethics of genetic modification.

Notebooking Homeschool Genetics Lessons

We encourage you to have your students keep notebooks for their science courses. In these journals, your student can write, draw, paste pictures, and create charts and graphs of the interesting and important details they cover while learning about genetics. These notebooks are also excellent receptacles for experiment notes, plus they make great study tools for comprehension tests.

Homeschool Genetics from Berean Builders

Genetics surrounds us, and you can find many opportunities for your homeschool student to investigate and explore the great mysteries printed in our code of life.

Find genetics discussions and experiments in the following Berean Builders courses:

Science in the Industrial Age

Discovering Design With Biology

And if you have any questions about teaching genetics to your students, we are here to help with plenty of resources and reassurance.

Posted on

States of Matter: Homeschool Learning Resources

One exciting concept to explore in elementary and middle school homeschool is the states of matter. You can keep it simple for younger students and expand on the knowledge for a deeper exploration in middle school including non-Newtonian fluids and plasma.

Need some ideas about how to teach the states of matter for homeschool science? Let’s go!

What are the States of Matter?

Matter can exist in three primary states: solid, liquid, and gas. How the atoms and particles are arranged in a substance determines its state.

  1. Solid: In solids, particles are closely packed and have a fixed position. Solids have a definite shape and volume.
  2. Liquid: Liquid particles are more loosely arranged and can move past each other. Liquids have a volume that depends on temperature but take the shape of their container.
  3. Gas: Gaseous particles have a lot of space between them and move freely. Gases have a volume that depends on pressure and temperature but take the shape of their container
  4. Plasma: The most common state of matter in the universe, this very state makes up the Sun and stars. It consists of positively-charged particles and free electrons. While it can be made in a lab, it does not exist naturally on earth.
  5. Non-Newtonian Fluids: Solid or liquid? Yes! Depending on how much stress they are under, these fluids, like ketchup and oobleck, can take on the properties of a solid.

Learning About The States Of Matter

Start With Observation

One of the easiest ways to introduce your child to the states of matter is by engaging their natural sense of curiosity. Point out various objects during the day that show examples of the different states of matter. Pick up a rock or a stick on your walk. Touch the milk in the glass. Smell perfume or blow bubbles.

Use simple, everyday examples to illustrate the differences between the states of matter. Show how water can exist as ice (solid), liquid water, and steam (gas) at different temperatures.

Conduct Hands-On Experiments

Hands-on experiments are a powerful way to make abstract concepts more tangible. You can find experiments online, in books, and in our courses. Here are some simple experiments you can try:

  1. Freezing and Melting: Place water in an ice cube tray and observe how it changes from a liquid to a solid when you freeze it. Conversely, watch it melt back into a liquid when it warms up.
  2. Evaporation: Leave a container of water outside and monitor how it disappears over time, evaporating into the air.
  3. Balloons and Air: Blow up a balloon to illustrate the properties of a gas.
  4. Good Morning Coffee: A great way to start the day with states of matter is to observe the solid mug, the liquid coffee, and the steam rising from the coffee.
  5. Sublimation: Set out some dry ice and watch it turn directly to vapor.
  6. Oobleck: Explore the properties of a non-Newtonian fluid right in your kitchen.

Use Visual Aids

Visual aids like diagrams, pictures, and videos can help reinforce the concepts of states of matter. Use diagrams to illustrate the arrangement of particles in solids, liquids, and gases. Videos can show real-world examples of matter transitioning between these states.

Put your student’s creativity to work in their notebooks as they document their understanding of the topic. Or have them create a collage of pictures representing the different states of matter.

Dive Deeper into Each State of Matter

Solids

Explore the properties of solids in more detail. Discuss how the particles in solids are tightly packed, leading to their fixed shape and volume. Here are some activities to reinforce this concept:

  1. Molecular Models: Use molecular modeling kits or household items like building blocks to create solid structures. This hands-on approach can help kids visualize the arrangement of particles in solids.
  2. Classification: Encourage your child to classify objects around the house as solids. Discuss their properties, such as rigidity and inability to flow.

Liquids

Investigate the properties of liquids and their transition from solid to liquid and vice versa. Some activities for this phase include:

  1. Mixing Liquids: Explore how different liquids mix and interact. For example, mix oil and water to show that they don’t readily blend.
  2. Water Cycle: Discuss the water cycle to explain how water can change from a liquid to a gas (evaporation) and back to a liquid (condensation).

Gases

Teach your child about the properties of gases and how they differ from solids and liquids. Activities to consider include:

  1. Invisible Gases: Discuss how gases are all around us, even though we can’t see them. Use simple examples like the air we breathe or the scent of a flower.
  2. Gas Expansion: Illustrate the concept of gas expansion by spraying some perfume in a room.

Plasma

Explain how the sun and stars are made up of plasma. Then bring the concept to life at home:

  1. Play with a plasma ball to observe how the gas inside interacts with the electric coil to make lightning-like arcs.

Relate States of Matter to the Real World

To make learning more relevant and interesting, connect the states of matter to real-life examples:

  1. Cooking: Explain how heat changes the state of matter in cooking, for instance, melting butter or boiling water.
  2. Weather: Discuss how temperature affects the state of water in the atmosphere, causing rain, snow, or clouds. If it’s winter, try to find a location where you can see snow, water, and clouds at the same time. Water in its three states of matter in one place!
  3. Phase Diagrams: Introduce phase diagrams to show how substances change states under varying temperature and pressure conditions.
  4. Gas Laws: For older students, you can explore gas laws like Boyle’s Law and Charles’s Law to explain how gases behave under different conditions.
  5. Tesla Coils: Investigate Tesla coils to learn more about the characteristics of plasma.

Understanding the states of matter is a basic concept for science students of all ages they can apply to higher knowledge throughout their lives.

States Of Matter With Berean Builders

If you are looking for an integrated and more in-depth curriculum to help your child learn about the states of matter, we recommend Science in the Beginning.


Posted on

The Periodic Table: Homeschool Learning Resources

the periodic table

Arguably one of the greatest contributions to the field of chemistry, the periodic table of the elements is more than just a graphical arrangement of symbols and numbers. Who was responsible for this monument of scientific history? And how can we as scientists make the most of the periodic table in our studies?

What is the periodic table of the elements?

The periodic table is a structured grouping of the 118 identified elements in our world. The table is organized into rows called periods and columns called groups. The groups contain elements that have similar chemical behavior.

Each block on the periodic table is a snapshot of one element that lists its:

  1. Chemical symbol
  2. Atomic number
  3. Average atomic mass of its isotopes.

You can investigate the periodic table to find patterns for yourself.

In a given period, the farther to the right the element is on the table, the smaller it is, the more electronegative it is, and the higher its ionization energy. By contrast, in a given group, the farther down the element is, the larger it is, the less electronegative it is, and the lower its ionization energy.

You will also find that the elements can be separated into metals, nonmetals, and metalloids. Most periodic tables use color to identify these categories, but the elements far to the left are metals, the ones to the far right are nonmetals, and some of the elements in between are metalloids.

The periodic table is a wonderful resource for solving chemistry problems and equations.


The names and letter symbols of the elements come from various sources such as 

  1. Latin (aurum for Au – Gold or natrium for Na – Sodium) 
  2. Greek (kryptos/stranger for Krypton or baris/heavy for Barium)
  3. Other languages (Spanish platina/little silver for Platinum or the old Anglo-Saxon/Celtic word ludaihe for Lead and the Latin word plumbum which became lead’s symbol Pb)
  4. People (Curium or Einsteinium)
  5. Places (Americium or Ytterbium)
  6. Planets and Asteroids (Plutonium or Cerium)

In addition to using this valuable resource for high school chemistry, younger homeschool students can familiarize themselves with the periodic table through word and number games, or hands-on discovery of elements around them.

  • Find interactive tables that list actual everyday uses for all of the most common elements, and let your students find these common items around your home.
  • Use the chemical symbols on the periodic table to spell words or create puzzles.
  • Decorate graphic artwork or create fun science-related greeting cards with chemical symbols.
  • Color the periodic table based on a properties key.
  • Find books about the periodic table to bring the information to life.
  • Create a card deck of the elements and make up games.
  • Use sticky notes to build a periodic table on the wall as your students learn new elements.

How many more fun ways can you find for your younger students to explore the periodic table?

The History of the Periodic Table

So how did we get this graphic marvel of modern chemistry?

Dmitri Mendeleev gets credit for organizing the elements into his periodic table in 1869, Previous earlier attempts by other scientists rarely get noticed, but were excellent examples of people trying to wrangle the elements into some semblance of order.

Way back in 1789, Antoine Lavosier began listing certain substances he believed were broken down as far as they could be. He called these substances “simples”.

Then John Dalton produced a table in 1805 of atomic masses derived from mixing elements to determine what they created. Although the measurements were primitive since the ratios were unknown, Dalton did develop the atomic theory.

In 1862, Alexandre-Emile Beguyer de Chancourtois devised a 3D model he called a telluric screw. This device, when rotated, displayed the atomic weights of certain elements at regular intervals and clearly showed a “periodic” occurrence of these weights.

John Newlands also noticed patterns among the atomic weights of elements and created an arrangement in 1865. His Law of Octaves compared these patterns with musical notes arranged in scales. The reason he used intervals of 7 is because the noble gasses hadn’t been discovered yet, and didn’t leave spaces for future discoveries. But he was on the right track and eventually got credit for his discovery.

Around the same time as Mendeleev was designing his periodic patterns, Julius Lothar Meyer recognized the periodicity of elements. At first, he played with just a few elements and made a chart of how they combined with each other, then later added the transition metals. His chart was very similar to the one Mendeleev published, but Meyer’s work was published a year later, so he deferred to Dmitri as the first.

Mendeleev sorted and arranged the elements into the original precursor table of our current table. He intuitively placed elements in their places based on their atomic weights as well as their properties in relation to similar elements. Since he was fond of card games, Dmitri initially used paper cards with atomic weights and arranged elements into groups he called “suits”.

An important feature of his table were the gaps he left for undiscovered elements and he even made predictions as to the characteristics of five of them. These predictions turned out to be accurate. Then when the noble gasses were discovered in the 1890s, they fit right into the table, further proving Mendeleev’s work.

It turns out, Dmitri’s table even anticipated and provided evidence to prove atomic structure, something scientists of the time had not discovered.

Mendeleev said of his discoveries:

“Before the promulgation of this law, the chemical elements were mere fragmentary, incidental facts in Nature. The law of periodicity first enabled us to perceive undiscovered elements at a distance which was inaccessible to chemical vision.”

He also said:

“Elements arranged according to the size of their atomic weights show clear periodic properties. All comparisons which I have made…lead me to conclude that the size of the atomic weight determines the nature of the elements.”

Finally, in 1913, Henry Moseley used x-rays to measure the wavelengths emitted by certain elements and then used a frequency calculation to figure out that atomic number actually represents the number of protons in the atoms that make up the elements.

Even in 1945 scientists were still making new discoveries and expanding the usefulness of the table. Glenn Seaborg made a discovery concerning a group of elements that modified the arrangement of one portion of the table, giving us the current version.

The Periodic Table in your homeschool

As you can see, many scientists contributed to the methodical organization of the elements in our world, and the periodic table continues to evolve today. With Mendeleev’s periodic law, the table continues to provide opportunities to discover new elements, and the periodic table as we know it today is a most useful scientific tool.

You will explore the periodic table of the elements more in our courses Science in the Atomic Age and  Discovering Design With Chemistry.

Posted on 3 Comments

Why We Teach The Sciences In A Specific Order

Remember when you were in high school? You probably took science in this order: Biology, Chemistry, Physics.

What is the reason for this sequence? To keep the subjects in alphabetical order?

Far from it.

The study of each of these sciences requires a certain level of understanding in mathematics for each. This discourages lower grades from leaping right into physics.

Conceptual Physics For Lower Grades: The Pros and The Cons

Some educational institutions have attempted to circumvent this by offering something called conceptual physics in lower grades.

And while it may offer a basic grasp of physics concepts, conceptual physics does not lead to a deep understanding of the science behind the equations.

Math-based physics is a superior approach in order for students to have an appreciation for the operations they are performing to demonstrate a physical concept.

A statement attributed to prominent physicist Ernest Rutherford is,

“All science is either physics or stamp collecting.”

In other words, we must understand the processes of biology, chemistry, and the other sciences through the lens of physics, or we’re simply gathering disconnected facts.

Physics, Or Natural Philosophy, Is The Basis For All The Sciences

Early scientists were all physicists. At the time, physics was called natural philosophy and focused on understanding the laws of the universe.

Speaking broadly, physics is the basis of everything, and to comprehend this broad natural philosophy, scientists needed to understand math.

Galileo stated it best when he said,

“Philosophy is written in that great book which ever lies before our eyes — I mean the universe — but we cannot understand it if we do not first learn the language and grasp the symbols, in which it is written.

This book is written in the mathematical language, and the symbols are triangles, circles and other geometrical figures, without whose help it is impossible to comprehend a single word of it; without which one wanders in vain through a dark labyrinth.”

And to comprehend physics, students must have a firm grasp of trigonometry.

We Teach High School Science Backwards: Teaching Sciences In A Specific Order

So, we teach high school science “backwards”.

  • Our courses begin with biology, which only requires basic math skills.
  • Then we offer chemistry, which needs an understanding of algebra to grasp.
  • And finally, we dive into physics after the student has moved through geometry and trigonometry.

Alphabetical order, maybe, but for a very concrete reason.

If we were to begin with the hardest subject, even though it’s the basis for all science, we’d turn some students off, as they would struggle without strong math skills.

In short, no trig, no physics.

The Importance Of Keeping Students Engaged In Science Courses

Even students who don’t naturally gravitate toward the sciences are more likely to stick with science courses if they start with the easier math-based subjects before they move on to physics.

And it turns out, students who have taken trig-based physics (versus conceptual physics) in high school do better at university with a calculus-based course.

As you’re looking through our course sequence, you’ll notice we have math prerequisites listed for each.

Once your student has mastered the specific math levels, you can confidently approach that science for the year.

Not Ready For Higher Level Sciences In Your Homeschool? No Problem

But what if your student isn’t mathematically ready for the next subject?

You can fill in their science requirements with any one of the other basic courses we have available while you wait for their math skills to catch up.

Give your student the best chance at learning and appreciating science by following our course schedule to offer the appropriate subject based on the level of math they have mastered.